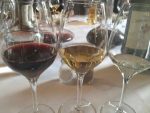
The wine tasting
Above all it is important to emphasize that everyone is able to taste a wine. Don’t pay attention to the boastful saying that only few people are able to taste a wine.
In fact all you need is: a glass suitable for the wine tasting, eyes, nose, a mouth, some taste buds and some memory skills. Basically everyone has one.
So now, all you need is the training (which, at the same time, it’s not a great sacrifice)
So how do things work in there?! The tasting takes place in four steps:
 1 – Sight: the color of the wine
Probably the least essential of steps … place your glass over a white background and watch the colors of the wine, its intensity.
The color of a wine evolves with age, and, for example, when a red wine be ages it will take on notes of orange, curled …
Tilt your glass slightly and turn right, watch the sides of the glass … what you see oozing around the edges is called the “legs” / the “tears” of wine.
Well there you may say “well and,… then? ”
So the wine legs allow you to have clues to the alcohol as well as its capacity to glycerol (greasy feeling in the mouth)
Quick tip BEFORE you begin this part we must first understand the logic that the taster has to have to identify flavors. Of course you can detect only flavors that you already know …. So everyone is free to get rich on that side
So, so like I said, there is a certain logic, an easy one, a lot of amateurs and professionals will advise you to follow these steps:
1. At the time of “feeling” the wine, do not try to put a name directly on the aroma but seek first to define the family of flavors (vegetable, mineral, animal, fruity, floral empyreumatic) …
2. Once the family was found, refine the name of the flavor in order to give the “category”, for example, family = plant; subfamily = fruit, red fruit category = …
3. Breathe (this is the right moment to say it lol) you are getting close to the end!
Last stage of the famous logic: THE PRODUCT NAME. Well, to stay in this example would be: strawberries, raspberries …. etc.
Here, the last bit of advice for this logic ;-):
Use simple words to describe how you feel …. and do not be afraid to express yourself. The tasting is a subjective “science”, therefore two people do not necessarily feel the same. However, we can verify your decision through an analysis!
2 – The first nose:
This is to feel the first aromas of the wine before oxygenation. “Breathe” and wine tasting apply the logic explained above.
3 – The second nose:
Rotate the nectar (I suggest you turn the glass in circles while staying straight. The wine “turns” inside the glass forming an ellipse).
I reassure you turn the wine is not a question of aesthetics / style, but to oxygenate the wine, that is to say to increase the liquid surface in contact with the air so that flavors develop.
Bring the glass to your nose and then reiterate the logic of taste. Thus you will realize that aromas have changed between the first and second nose .
Often the flavors continue to evolve in the future, without necessarily re-oxygenate the wine. So feel free to “feel” thereafter.
 4 – The mouth:
For this step you should take a small amount of wine.
The passage in the mouth is divided into three stages:
1 – the attack (the first moment of the wine in your mouth). It can be “short”, “frank” or “aggressive”
2 – the middle (as the name suggests), this is the moment in which the wine flows between the papillae of the tongue and palate. Here the wine will reveal its texture, its tannins (sensation of dryness) but also its power (force in the mouth) and new flavors.
3 – the final (the persistence of flavor, even after being swallowed or spat out).
Here one can judge the “length” of a wine, that is to say, the persistence of flavors in the mouth after drinking the wine.


